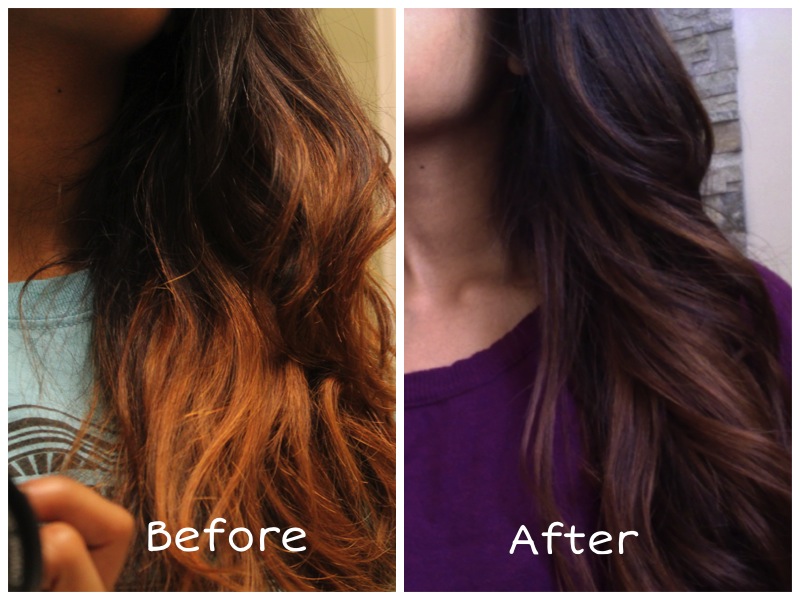
Disclaimer: I did not put any sort of filter on the images to emphasize the colours. The first picture was taken at night, while the second was taken during the day with natural lighting.
I recently dyed my hair in the ombre hairstyle and noticed that the colour was beginning to fade on the bottom. I wasn't super pleased with the way it was turning orange because it was not a very nice transition from my natural black hair and did not go well with my skin colour. I thought it would be a great idea to try out the Lush Henna in the colour Caca Brun to restore the darker tones to my hair. I realized that there were no tutorials on the web for the ombre hairstyle, so I thought I'd try it out and let people know the problems I encountered and offer some tips.
This is a really great product if you're looking for something that doesn't contain harsh chemicals. It's sold in blocks that contain henna power infused with coco butter, which provides amazing nourishment for your hair and leaves it soft and shiny! If you've used henna on your hands before like I have, you should have a good idea of the consistency of this product once it's melted and the smell. You should also be aware that it is not fully permanent and may fade after a little while depending on how often you wash your hair and your exposure to the sun. Also, the smell will linger in your hair for a couple of days, so if it's too strong for you, you may not want to try it.
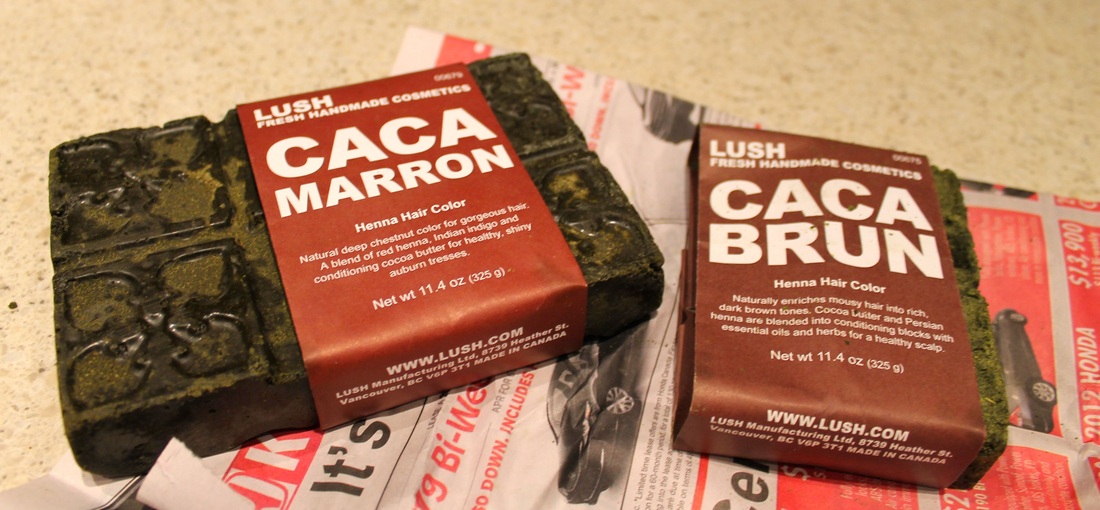
I used the Caca Brun colour the first time and then a combination of that and the Caca Marron the second time. It worked much better the second time around, but that is most likely my fault and not that of the Caca Brun bar.
You'll want to read through the whole article before your start so that you don't make any mistakes along the way. I have included a printer-friendly PDF version of the instructions without pictures so that you can refer to that while you try this and avoid getting your computer dirty.
This is a really great product if you're looking for something that doesn't contain harsh chemicals. It's sold in blocks that contain henna power infused with coco butter, which provides amazing nourishment for your hair and leaves it soft and shiny! If you've used henna on your hands before like I have, you should have a good idea of the consistency of this product once it's melted and the smell. You should also be aware that it is not fully permanent and may fade after a little while depending on how often you wash your hair and your exposure to the sun. Also, the smell will linger in your hair for a couple of days, so if it's too strong for you, you may not want to try it.
I used the Caca Brun colour the first time and then a combination of that and the Caca Marron the second time. It worked much better the second time around, but that is most likely my fault and not that of the Caca Brun bar.
You'll want to read through the whole article before your start so that you don't make any mistakes along the way. I have included a printer-friendly PDF version of the instructions without pictures so that you can refer to that while you try this and avoid getting your computer dirty.
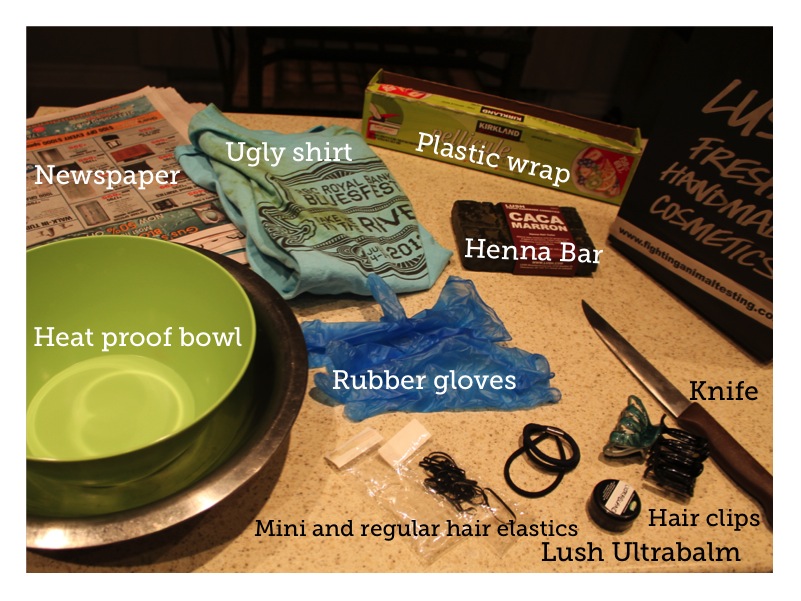 What you will need: | 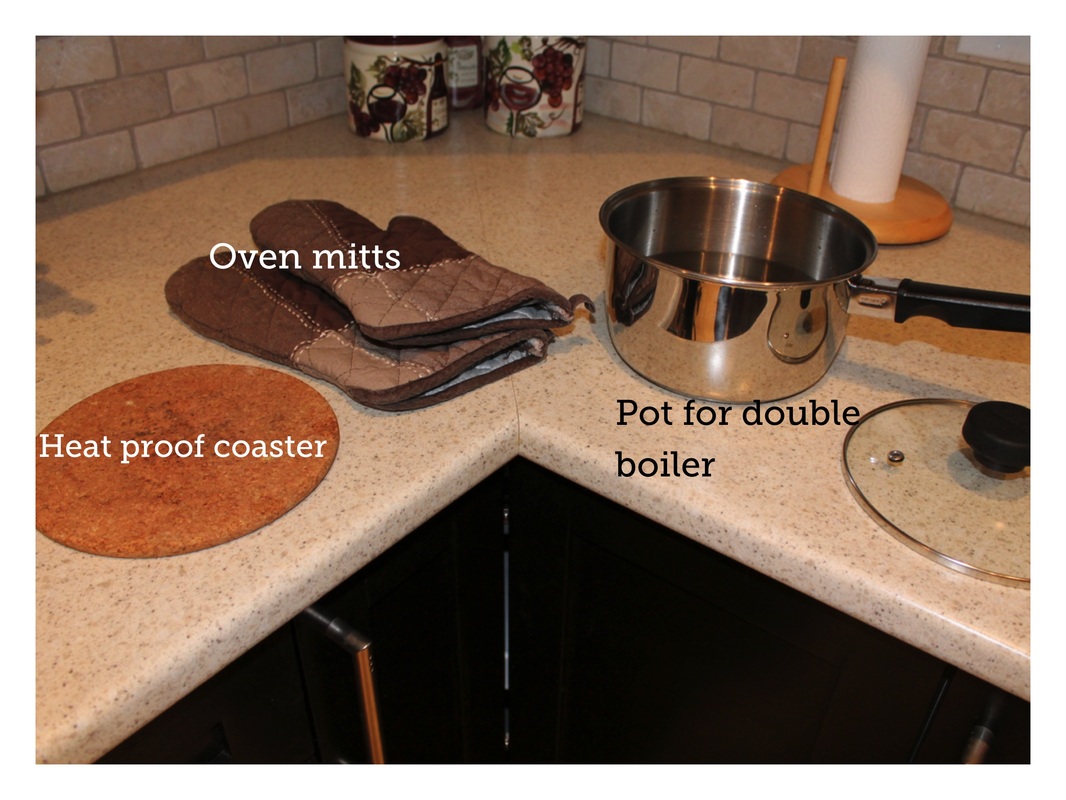 |
- Lush Henna brick (choose from colours Caca Rouge, Caca Marron, Caca Brun or Caca Noir; I used Caca Brun and Caca Marron)
- heat proof bowl
- kettle and pot of boiling water
- knife for cutting block of henna (you could use a grater, but I wouldn't recommend that)
- wooden spoon or spatula for mixing while bar melts
- pot for double boiling
- oven mitts (safety first)
- lot's of newspaper
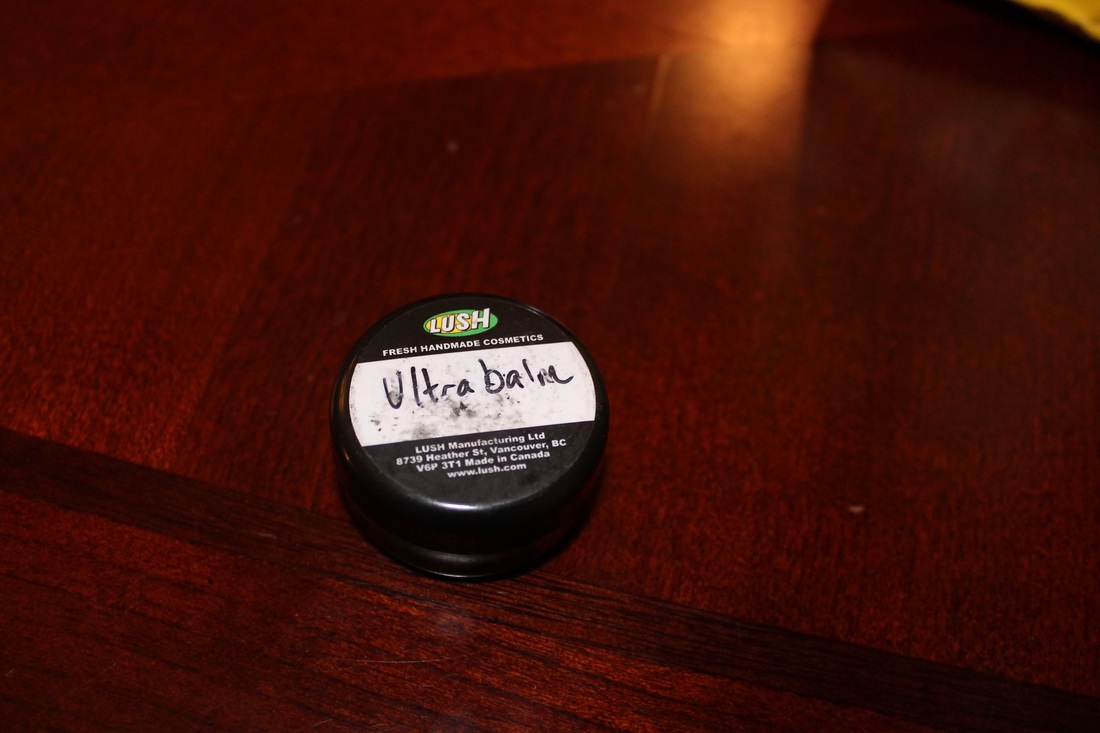
- Lush Ultrabalm or vaseline
- hair clips (clamps)
- rubber gloves
- saran (plastic) wrap
- small and large hair elastics
- towel (dark preferably) and ugly shirt
- heat proof bowl
- kettle and pot of boiling water
- knife for cutting block of henna (you could use a grater, but I wouldn't recommend that)
- wooden spoon or spatula for mixing while bar melts
- pot for double boiling
- oven mitts (safety first)
- lot's of newspaper
- Lush Ultrabalm or vaseline
- hair clips (clamps)
- rubber gloves
- saran (plastic) wrap
- small and large hair elastics
- towel (dark preferably) and ugly shirt
What to do beforehand
1. Go to your nearest Lush store if you have one in your city and pick up the bar. It costs $25.95 CAD before tax, which comes out to approximately $30 CAD after tax. I would not recommend buying this online if you can avoid it because it costs the same, plus you would have to pay for shipping. Moreover, if you go in to the store, they will give you gloves and a sample of Ultrabalm to use. If they don't offer, just ask them and they'll be happy to provide you with some. Do this a few days before you want to fully dye your hair.
2. Wash you hair and do a test strand! This is very important (especially if you have light hair). I've read reviews of people online who didn't realize how brown the Caca Brun bar would take their blond hair. You can do this before you go to bed. Use about 1/4 - 1/2 of a square and dissolve it in boiling water until it resembles yogurt in consistency. Coat a strand of your hair from the back of your head in the paste and then wrap it in saran wrap (to protect your pillows and such). If you have ombre hair, you only need to coat up to where the bottom colour meets the top colour. Use hair elastics to secure the saran wrap on the top and bottom of the hair strand. You may want to sleep on a towel. Wash out in the morning.
Disclaimer: Please be aware that I already had my hair dyed in the ombre style before darkening it with Lush Henna. I did not include instructions on how to bleach your hair in the ombre style and would highly recommend that you get that done at a salon. This technique is meant to darken fading ombre hair, or can be used generally to darken your full head of hair. However, if your hair is black or very dark brown, you'll rarely notice much of a change in colour. You would get the deep conditioning that the Lush Henna bar has to offer and some undertones of the colour, so it wouldn't be a complete waste!
Disclaimer: Please be aware that I already had my hair dyed in the ombre style before darkening it with Lush Henna. I did not include instructions on how to bleach your hair in the ombre style and would highly recommend that you get that done at a salon. This technique is meant to darken fading ombre hair, or can be used generally to darken your full head of hair. However, if your hair is black or very dark brown, you'll rarely notice much of a change in colour. You would get the deep conditioning that the Lush Henna bar has to offer and some undertones of the colour, so it wouldn't be a complete waste!
Let's start!
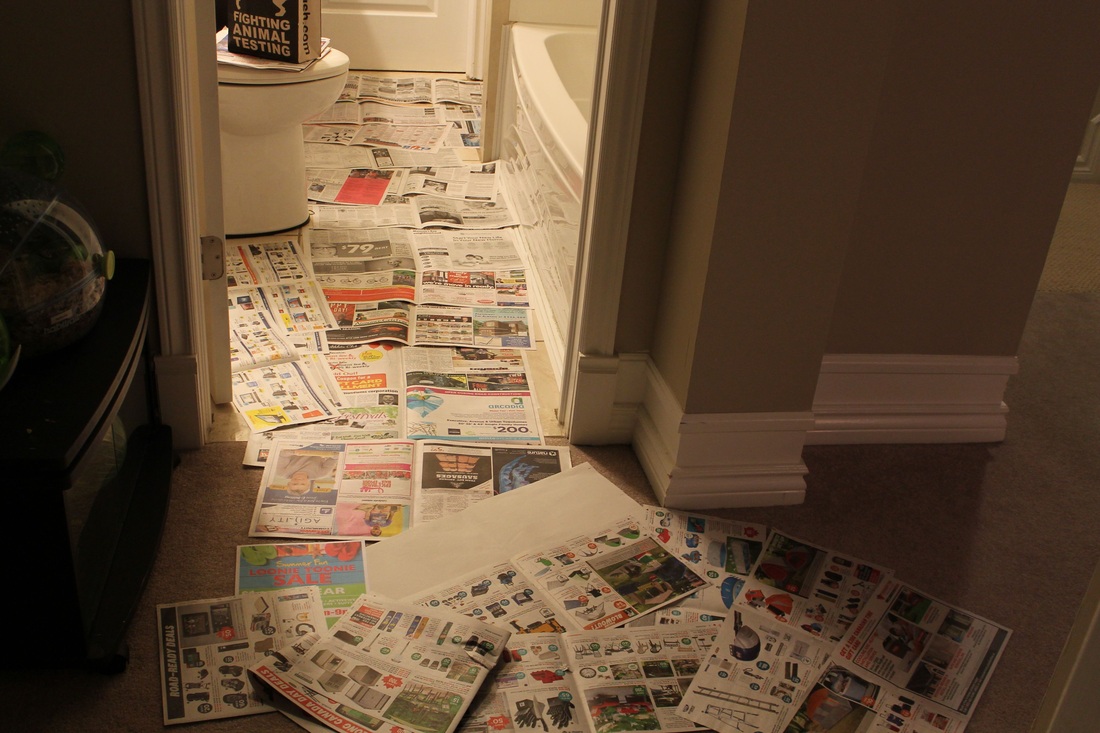
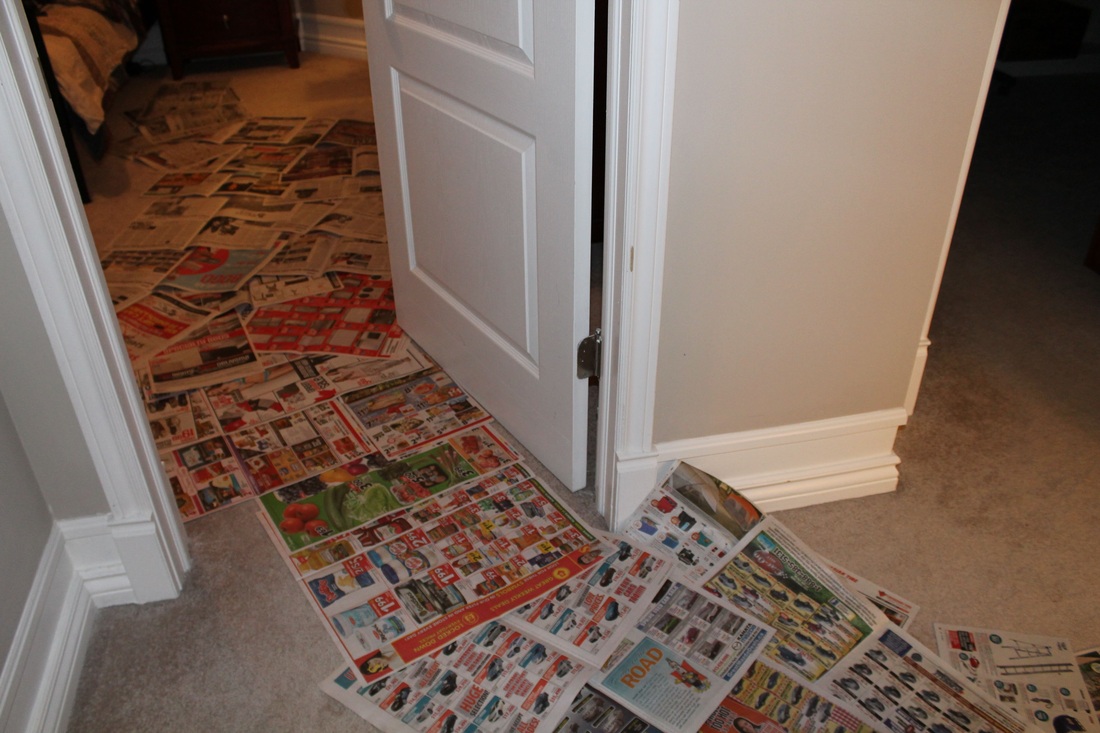
3. Pick a night you can fully devote to doing this. Start before 10 pm if this is your first time because it might take a while. Lay down plenty of newspaper to protect your floors. I made a newspaper pathway from my washroom to my bedroom. Don't worry, you can recycle most of it afterward if you're careful not to made too much of a mess everywhere.
 |  |
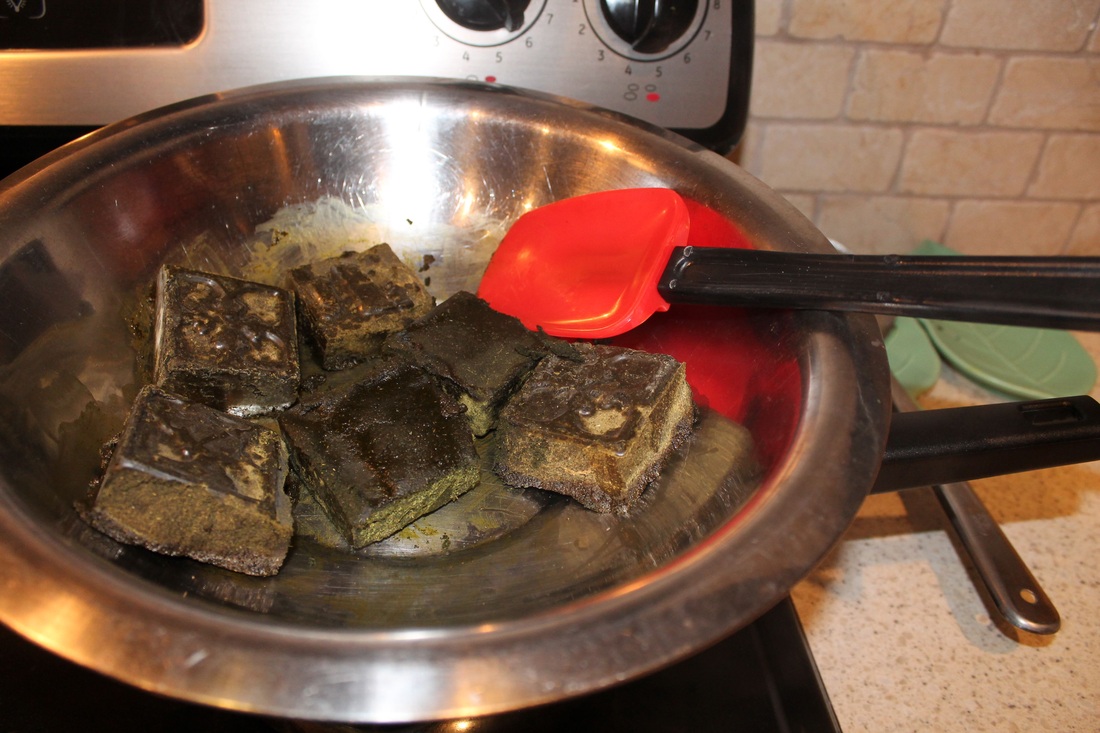
4. Cut up the henna block into squares and store away what you do not need. The block already comes with “perforations” for six squares. Cut along these lines. My hair reaches just above my elbow and I found a full block (6 squares) was the right amount for me. I do have a lot of hair though, so you may need less. I used 2 squares of a Caca Brun bar I already had and 4 Caca Marron squares from the new bar I bought. Store away whatever you do not use.
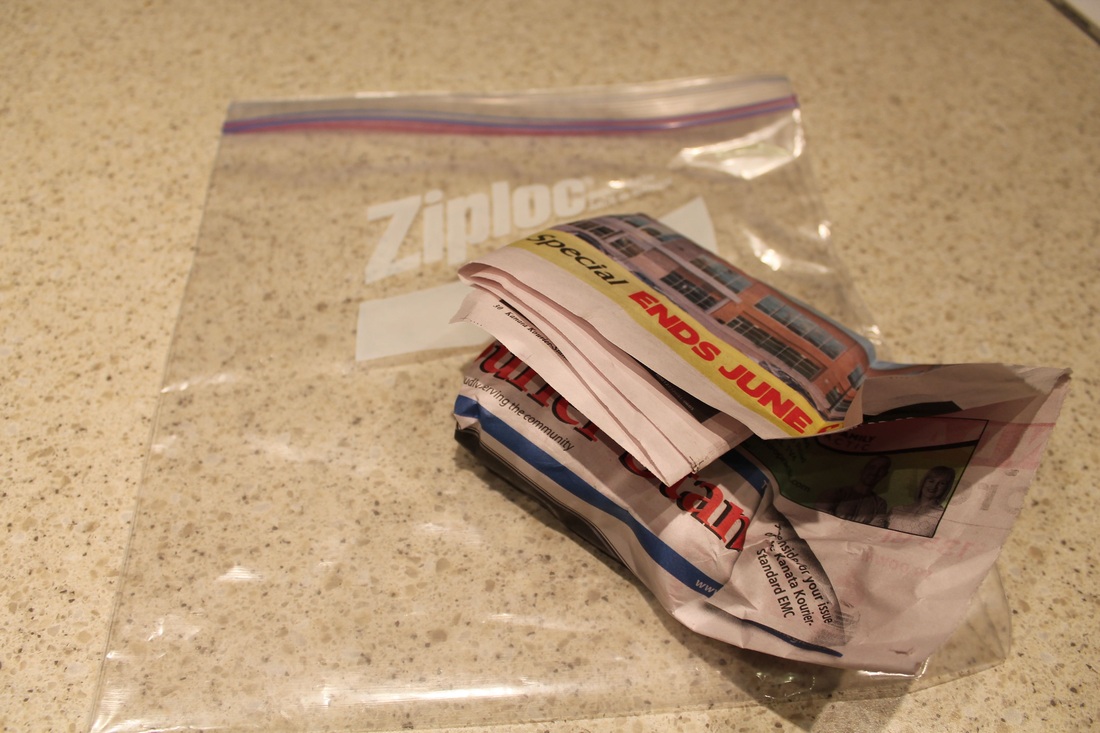 Wrapped in newspaper | 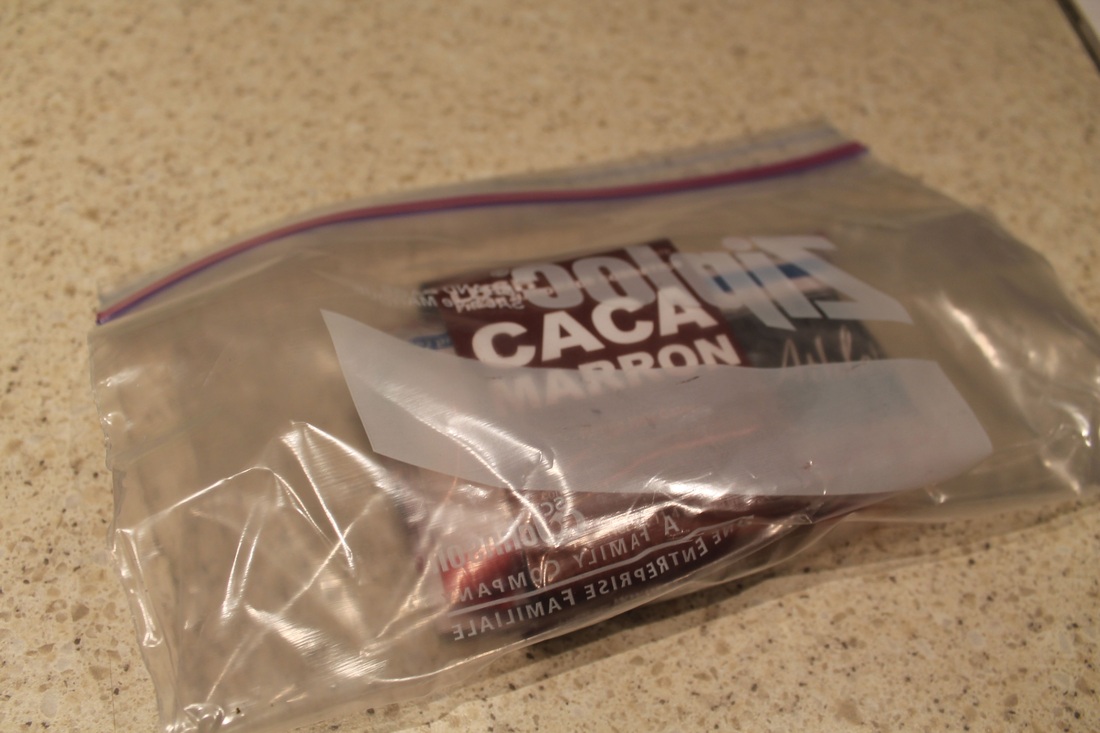 Stored in a Ziplock bag to maintain freshness |
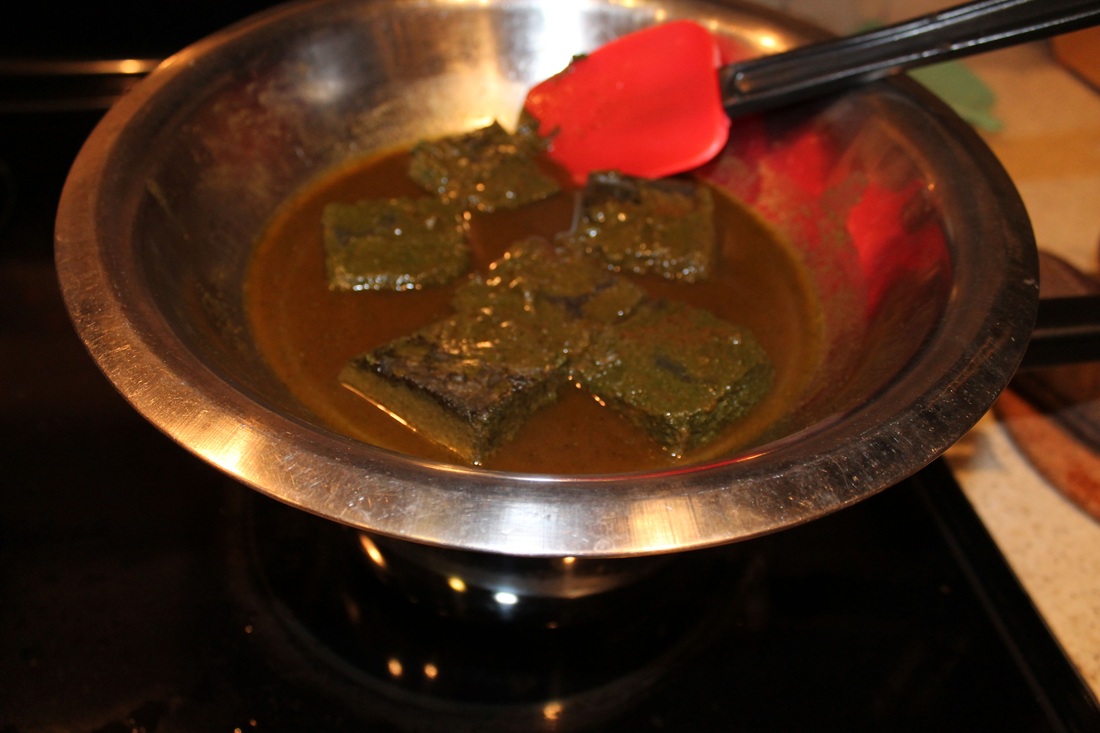
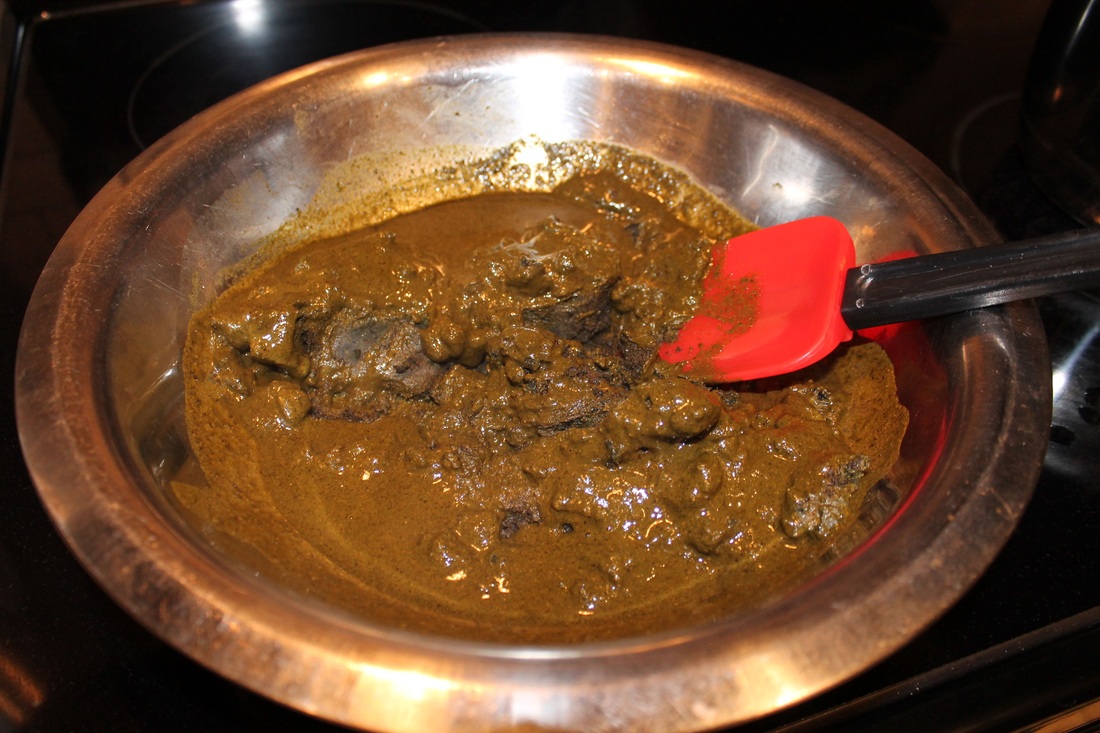
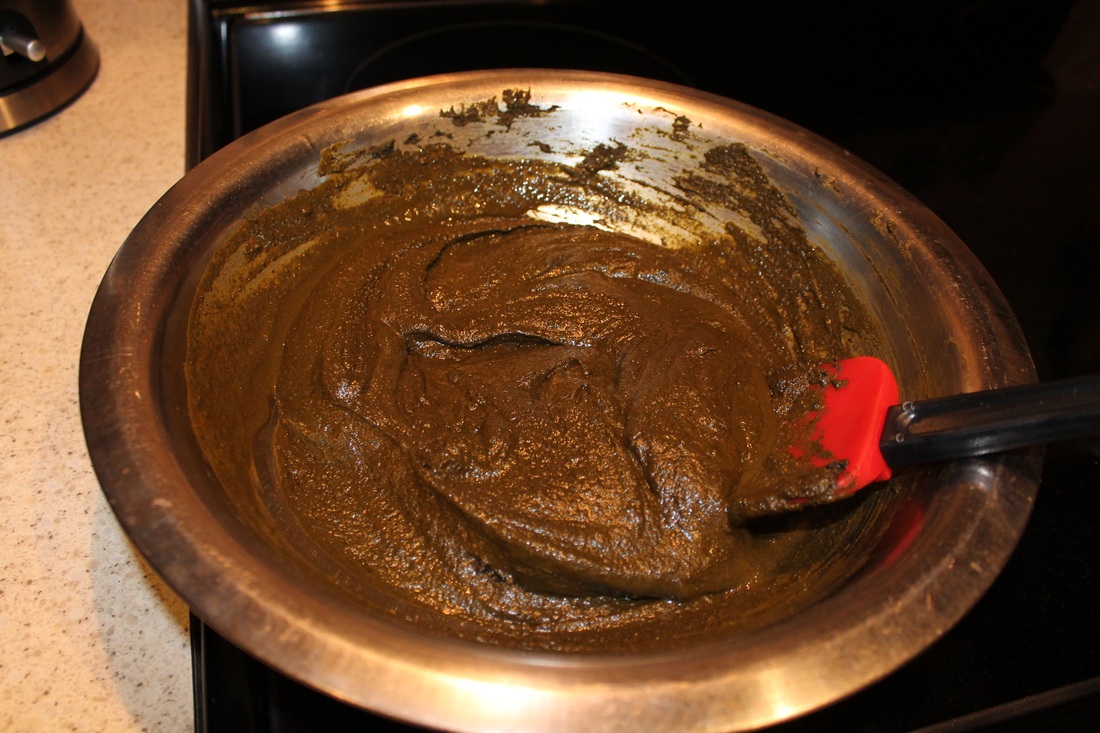
5. Set up a double boiler to melt the henna squares. Prepare a pot of boiling water (about 1 inch high with water) and set a heat proof bowl on top. Place the squares into the bowl and allow them to begin to melt. Add boiling water from a kettle to the mixture and stir with a spatula or wooden spoon. Continue to melt the mixture until it resembles a yogurt consistency.
TIP: add more water than less if you're unsure because the more you let it sit, the more the water will absorb in and it may become dry and difficult to apply. This melting process took me approximately 10-15 minutes. You will also want to use a hood fan if you can because the smell is quite strong and very earthy.
Alternatively: if using a double boiler scares you the way it scares me, you can also simply add boiling water to a heatproof bowl to melt the squares. Apparently the squares won't melt as evenly, but I didn't notice much of a difference.
 |  |
 |  |
6. Prepare your hair and face. Apply the sample of Ultrabalm or Vaseline to your hairline and on your ears to protect them from the dye. It's very important to make sure you brush your hair before starting. I suspect this is the reason it didn't work so well for me the first time around. Brushing helps the henna paste coat all of the individual strands rather than just those on the outside.
TIP: this is a good time to make sure you have everything you will need for the rest of the night near by. You don't want to be walking around too much because you might make a mess around your house. Maybe keep some snacks and magazines with you for later. Make sure you are wearing a shirt you don't mind getting stained!
TIP: this is a good time to make sure you have everything you will need for the rest of the night near by. You don't want to be walking around too much because you might make a mess around your house. Maybe keep some snacks and magazines with you for later. Make sure you are wearing a shirt you don't mind getting stained!
 A free sample from the Lush store. You can use vaseline as well. | 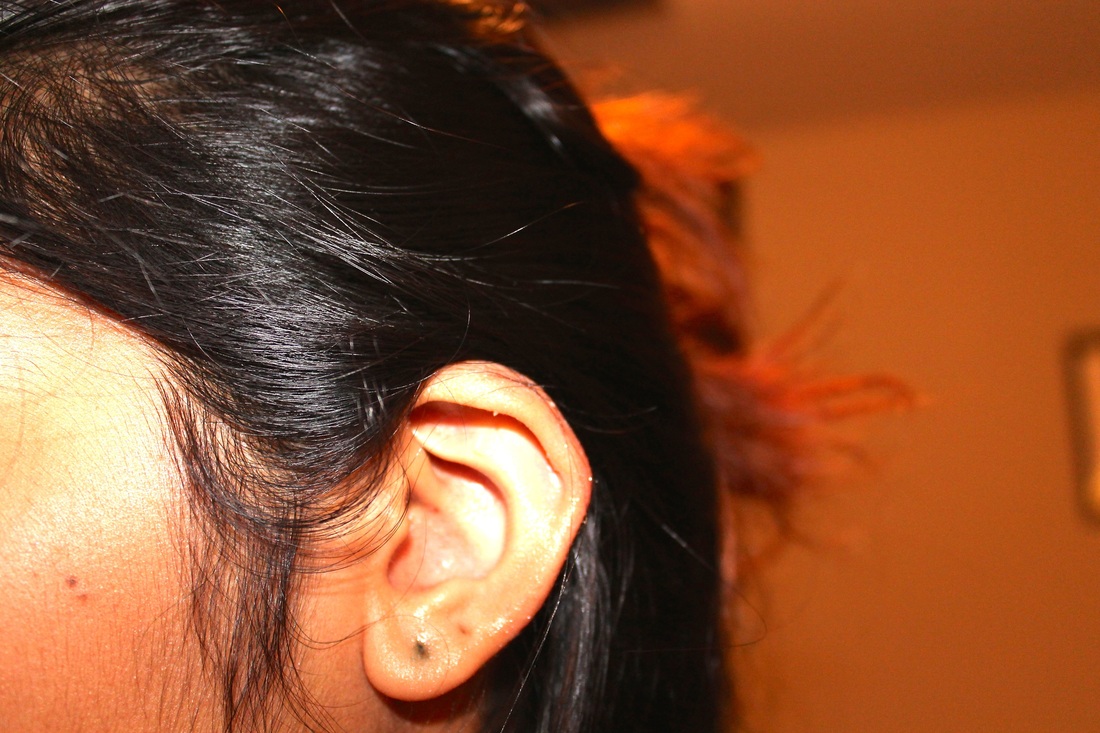 Create a barrier on the skin where you feel it may get stained. |
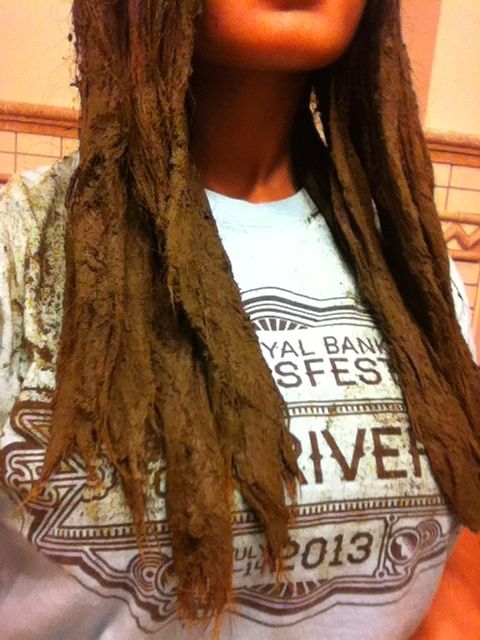
7. Section off your hair and apply the henna paste! I found it much easier to coat all of my hair when I sectioned off the top part and did the bottom half first. This may not be necessary for you if you have less hair or a friend to apply the henna for you. I kept a kettle handy in case the paste began to dry out as I was applying. Don't forget your gloves!
 |  Add warm water if you feel the remaining paste is beginning to dry. |
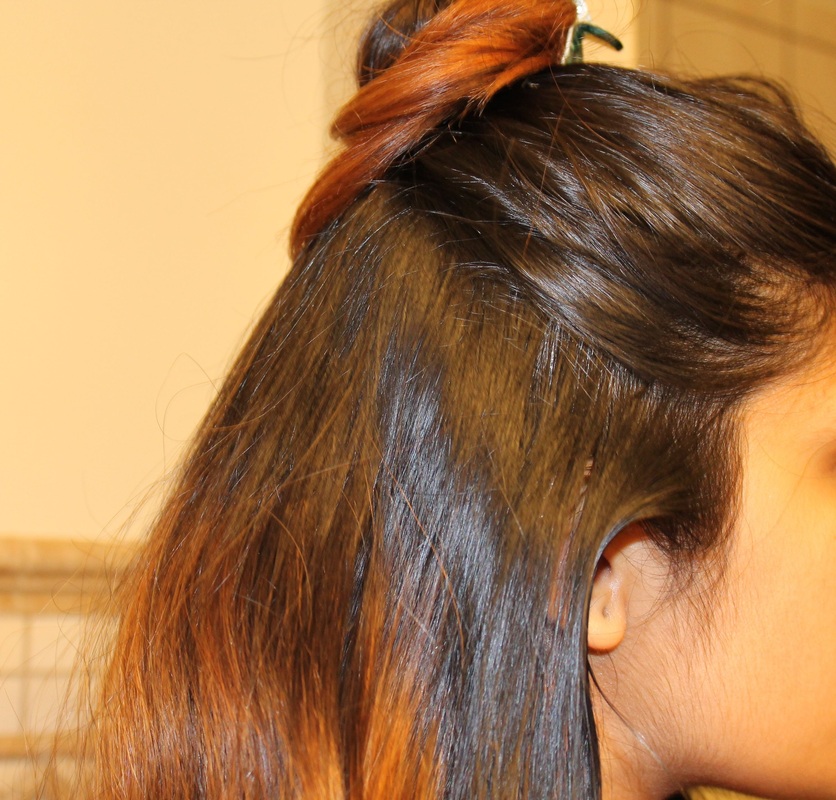
For ombre hair I tried 2 techniques:
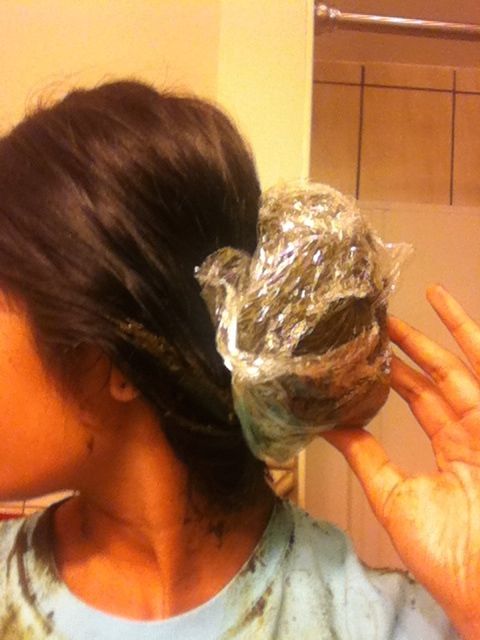
Cleopatra: coat just a bit above where your hair fades from the natural colour to the new colour. Apply the henna in approximately 8 sections (4 on the left and 4 on the right side of your head). Cover the sections in saran wrap similarly to the way you would for a strand test and secure with elastic bands. Sleep on a towel or old shirt you don't mind soiling.
Pro: Does not hurt your neck as much as the bun method
Con: Did not work as well for me (but I suspect that is for other reasons) and only works for ombre hair
 1. Coat hair up to where it changes colour. This WILL get messy and gross. | 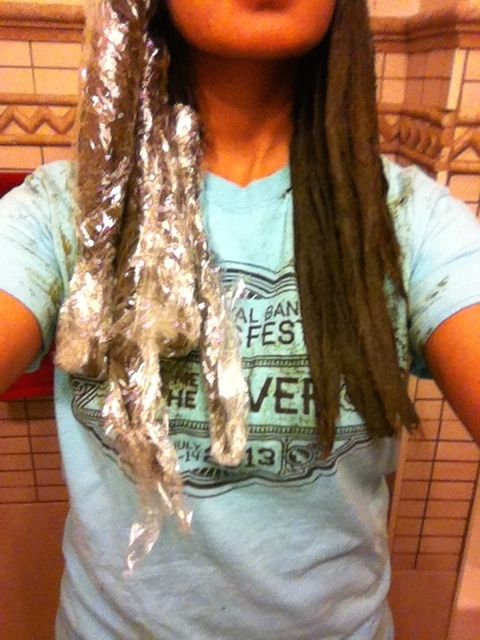 2. Take 2 inch strands and cover in plastic wrap. I had 4 on each side. |
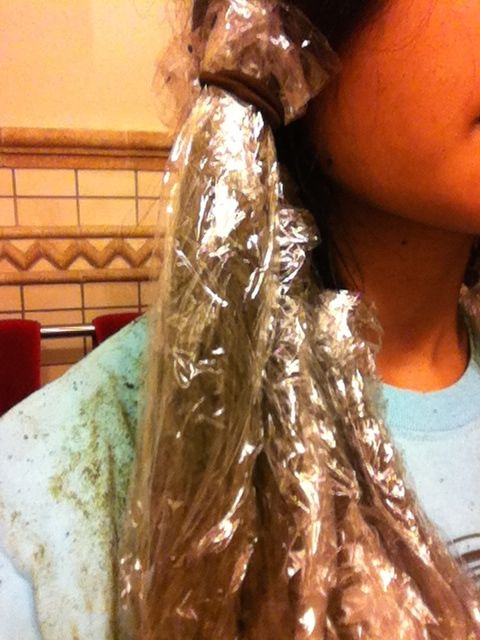 3. Secure on top with a larger hair elastic. | 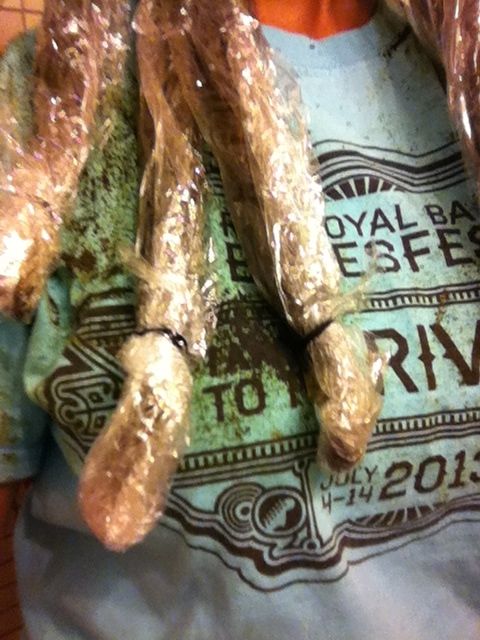 4. Secure bottom with a small elastic. |
Bun: coat the bottom section of your hair in the paste before the top section. Wrap your hair into a sort of bun and cover the bun in saran wrap (I used 4 pieces of saran wrap). Wrap your hair including the bun in a towel. This helped my neck support the bun and made for a lot less of a mess than the Cleopatra method.
Pro: Worked better for me and much less time consuming than the Cleopatra method.
Con: Hurts your neck more.
Pro: Worked better for me and much less time consuming than the Cleopatra method.
Con: Hurts your neck more.
 | 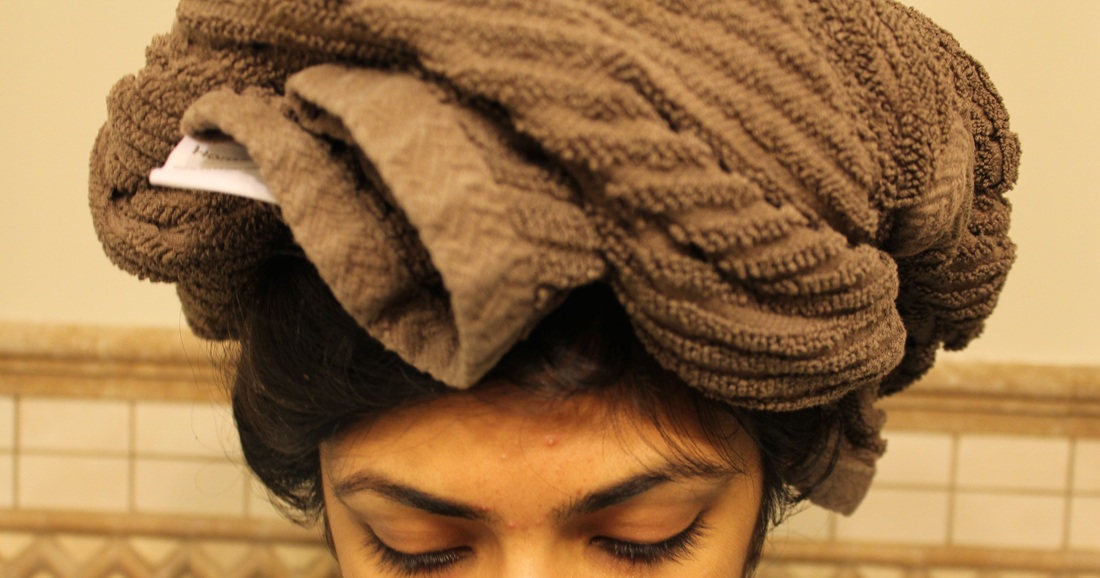 <-- Sorry about the poor image quality on some of the photos. I didn't want to ruin my camera while I was applying the henna, so I used my phone. |
If you do not have ombre hair, coat your full head of hair with the henna paste. You'll probably want it to be more watery at the start because it will take longer and you don't want it to dry out. Keep a kettle handy to add more boiling water if the paste dries out slightly. Wrap your full head of hair in saran wrap the way you would wrap your hair after a shower. You may want to use multiples pieces of saran wrap to secure the hair because it gets quite heavy. Wrapping your hair in a towel afterward may help reduce the mess.
TIP: spend a good amount of time working the henna into your hair. The first time, I suspect it worked less well for me because I didn't do this. Make sure the henna coats nearly every strand. Don't worry if it's not perfect though because it looks nice afterward when you end up with multi-toned hair!
8. Let the paste sit in your hair. You will want to leave this in for at least 5-6 hours in my opinion. If you would prefer that it fades sooner, you could always leave it in for less time. However, I would highly recommend that you leave this in over night. The heat from your body while you sleep will improve the depth of the colour vastly. Make sure you wash your feet before wandering around. My feet had lots of ink on them from the newspaper I was walking on. Sleep on a towel to protect your sheets!
TIP: treat this as a spa night. Since you will need to wait for a long period of time and you cannot really leave the area, this is a great time to do a facemask, your nails, or just watch a movie. This would be very fun to do with a friend for company and so you can laugh at how funny you both look with your Cleopatra saran wrapped hair.
The next morning
9. Wash out the henna paste and clean up. Let this be the first thing you do in the morning to save yourself some clean up time. This will make your shower very dirty. Continue to wash the paste out until the water runs clear. Your hair may smell of henna for the next couple of days. This is a good time to vacuum/mop/clean your tub because you don't want to leave any stains anywhere. Make sure you recycle the newspaper you did not get dirty with henna or save it for next time!
Overall Comments
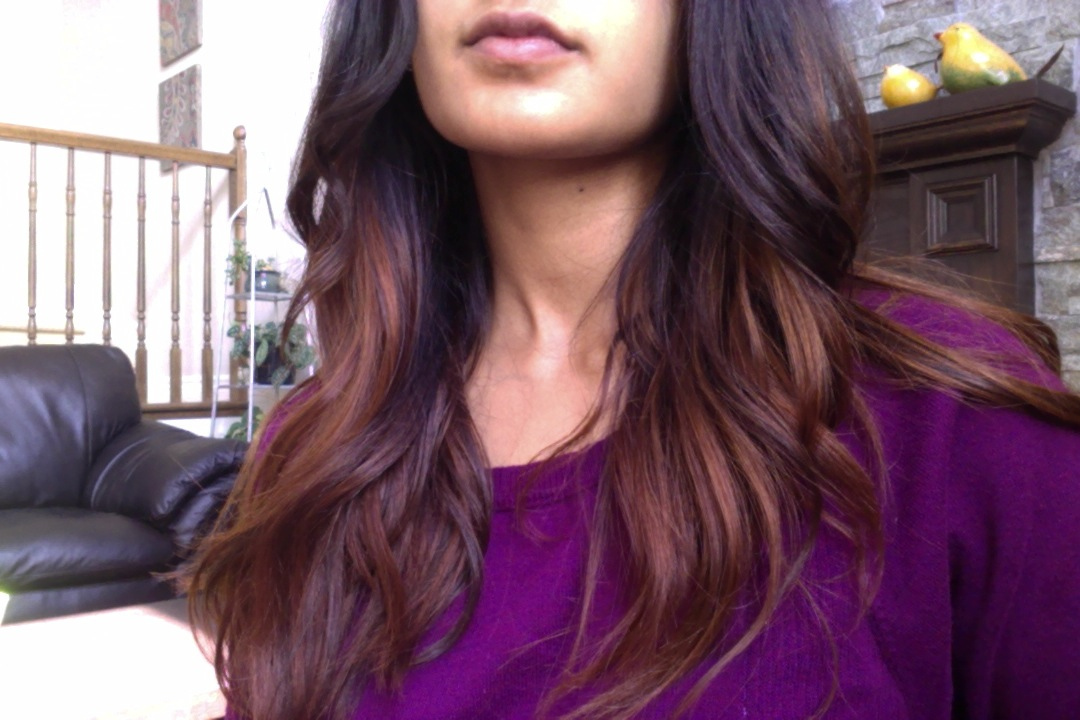
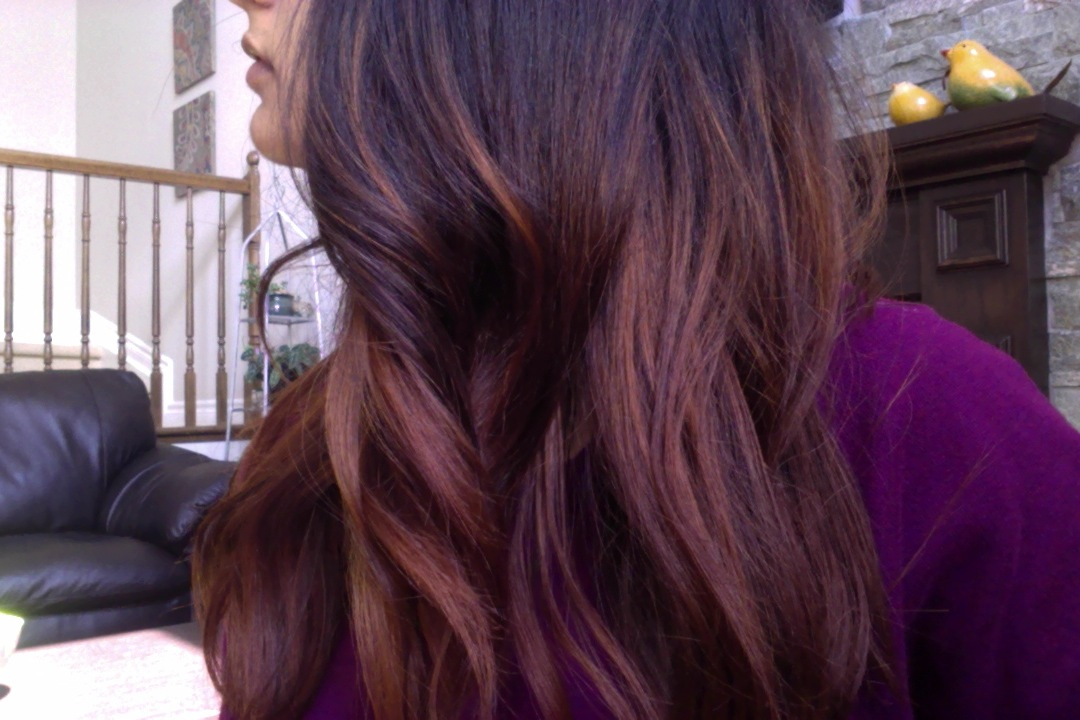
I was very happy with this product and would definitely recommend it if you don't mind dealing with the mess and can handle a somewhat strong smell. I found this to be great for darkening my fading ombre hair. I didn't have to worry about being a little sloppy about the job I did because my natural hair is black, so it didn't affect the colour other than in places I wanted it to. It looked great with the messy job I did because strands of hair remained lighter and some got darker, so I ended up with a really nice multi-toned effect.
5/5 stars for sure.
5/5 stars for sure.
 |  |
Links to the products I used:
Lush Henna Brick in Caca Marron
Lush Ultrabalm
If you have any questions about this or had a different experience with this product leave me a comment. Let me know how this works for you!
You may also want to read a review of this product with some important Do's and Don't.
Lush Henna Brick in Caca Marron
Lush Ultrabalm
If you have any questions about this or had a different experience with this product leave me a comment. Let me know how this works for you!
You may also want to read a review of this product with some important Do's and Don't.
 RSS Feed